AI setup
How to set up an AI agent
The agent answers visitors in its own words, following the instructions you write, and hands the conversation to an agent when it does not know the answer. Setup is three steps: name and face, a connected channel, instructions.
Before you start
- Owner access in the panel; this page is only visible to the account owner
- An account on the Pro plan. The free plan shows the list but keeps it locked
- A website or WhatsApp number already connected for the agent to answer on
Steps
Open the AI page
Click AI in the left menu. The list is empty on first setup, so the panel points you straight at the Add agent button.
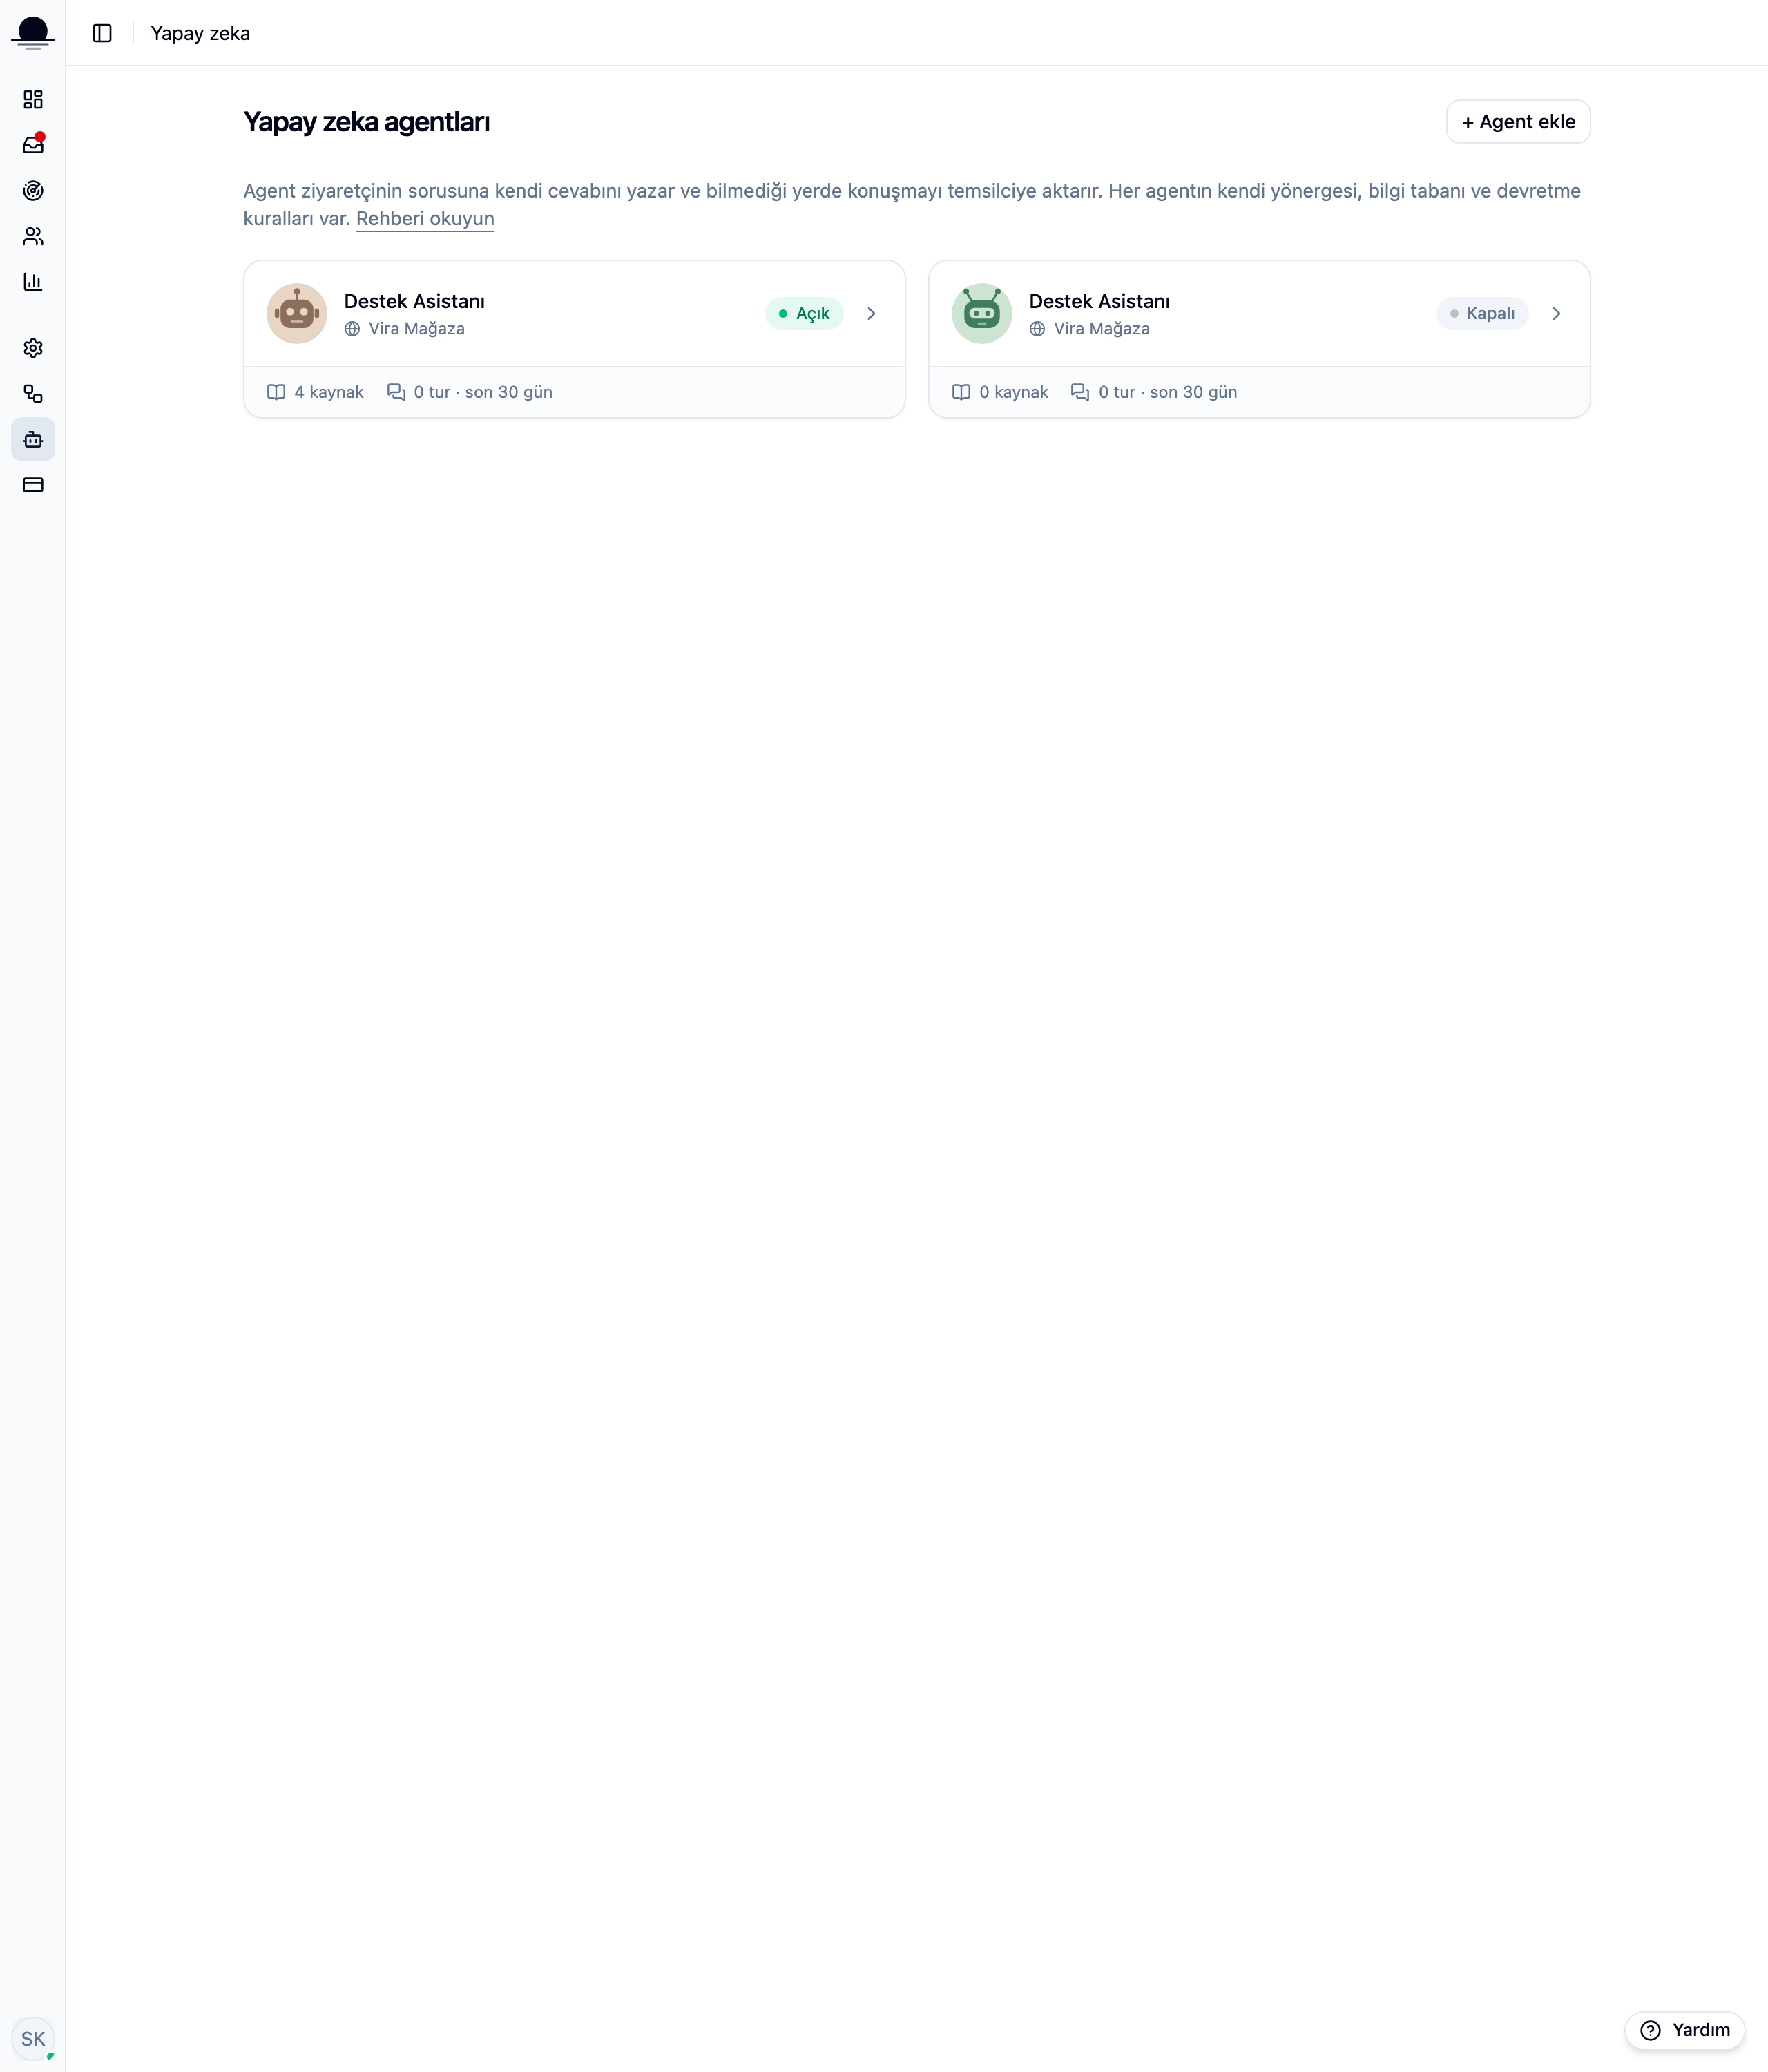
If you cannot find this page in the menu, you are not the account owner; ownership is transferred from the Users page.
Add agent, then set its name and face
The name is what the visitor sees in the chat window, the face is the avatar next to it. Both can be changed later. You will fill in instructions and knowledge sources on the next screen.
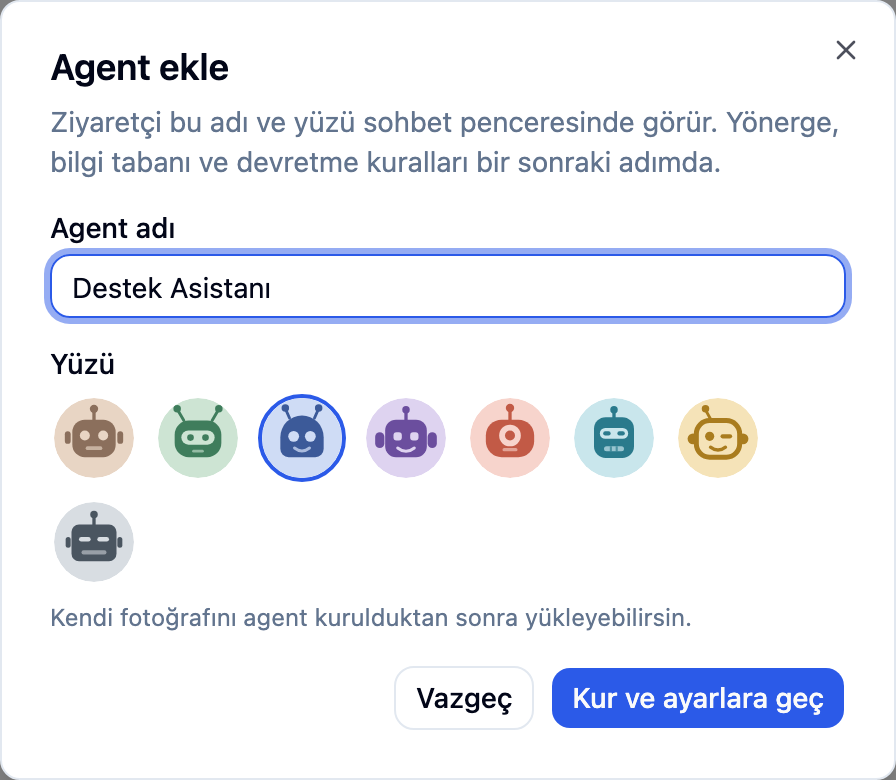
Pick its channel and write its instructions
Set up and continue takes you to the detail page. First tick the website or WhatsApp number the agent should answer on, then write what it needs to know about your business in the Instructions box. There is no autosave; nothing is kept until the bar at the bottom stops saying Unsaved changes.
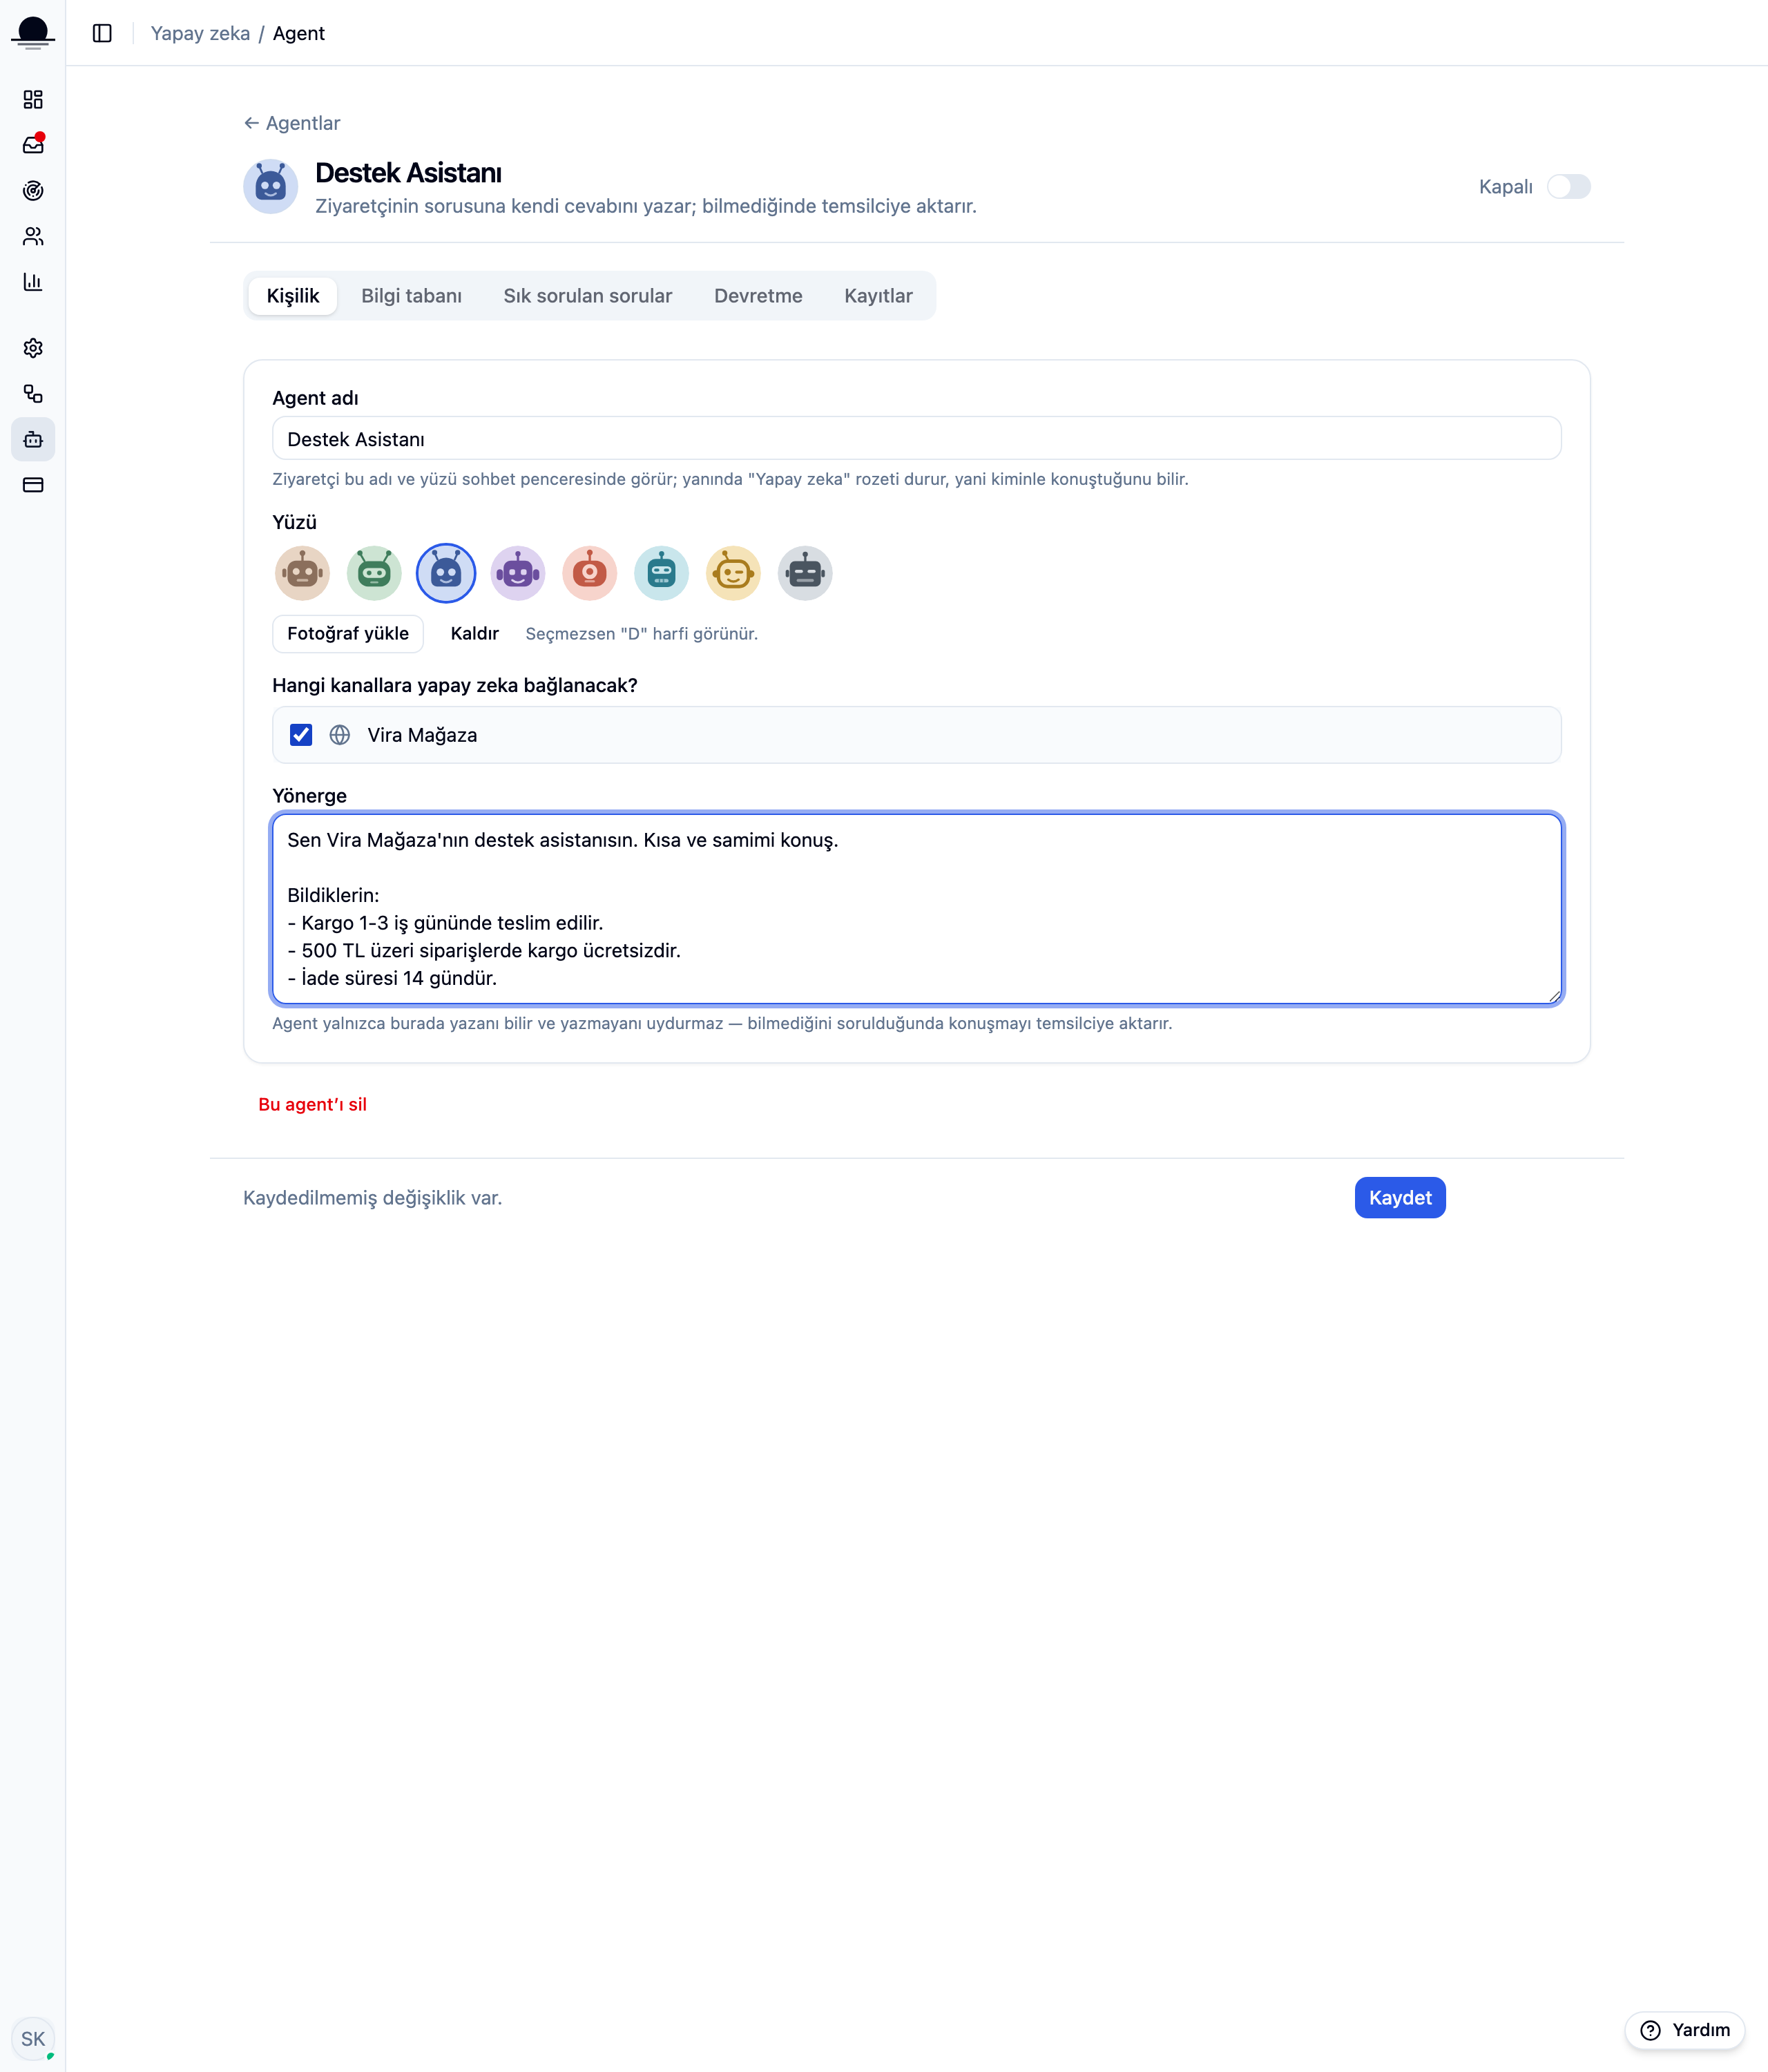
The agent only knows what you write here and what is in its knowledge base; it will not make up the rest. It hands off on a question it cannot answer.
Save it, then turn it on
Click Save, then flip the switch at the top to On. A new agent is born off by design, so one without instructions or a channel never starts talking to visitors.

Only one agent can be on for a given channel at a time. Turn a second agent on for the same site and the panel warns you it is unclear which one will actually answer.
Frequently asked
Related guides
No account yet?
The free plan covers 2 users and 200 conversations a month. No credit card.