Chat widget
Add the chat widget to your site
Register the site in the panel, copy the install snippet, and paste it into every page. The moment the box appears, the panel marks the site as connected.
Before you start
- Access to your site's HTML, or someone who has it
- Admin access in the panel
Steps
Open Websites under Settings
Every site that gets a chat box is one row here. Add a new one with Add site; the name is for you, so you can tell which site a conversation came from.
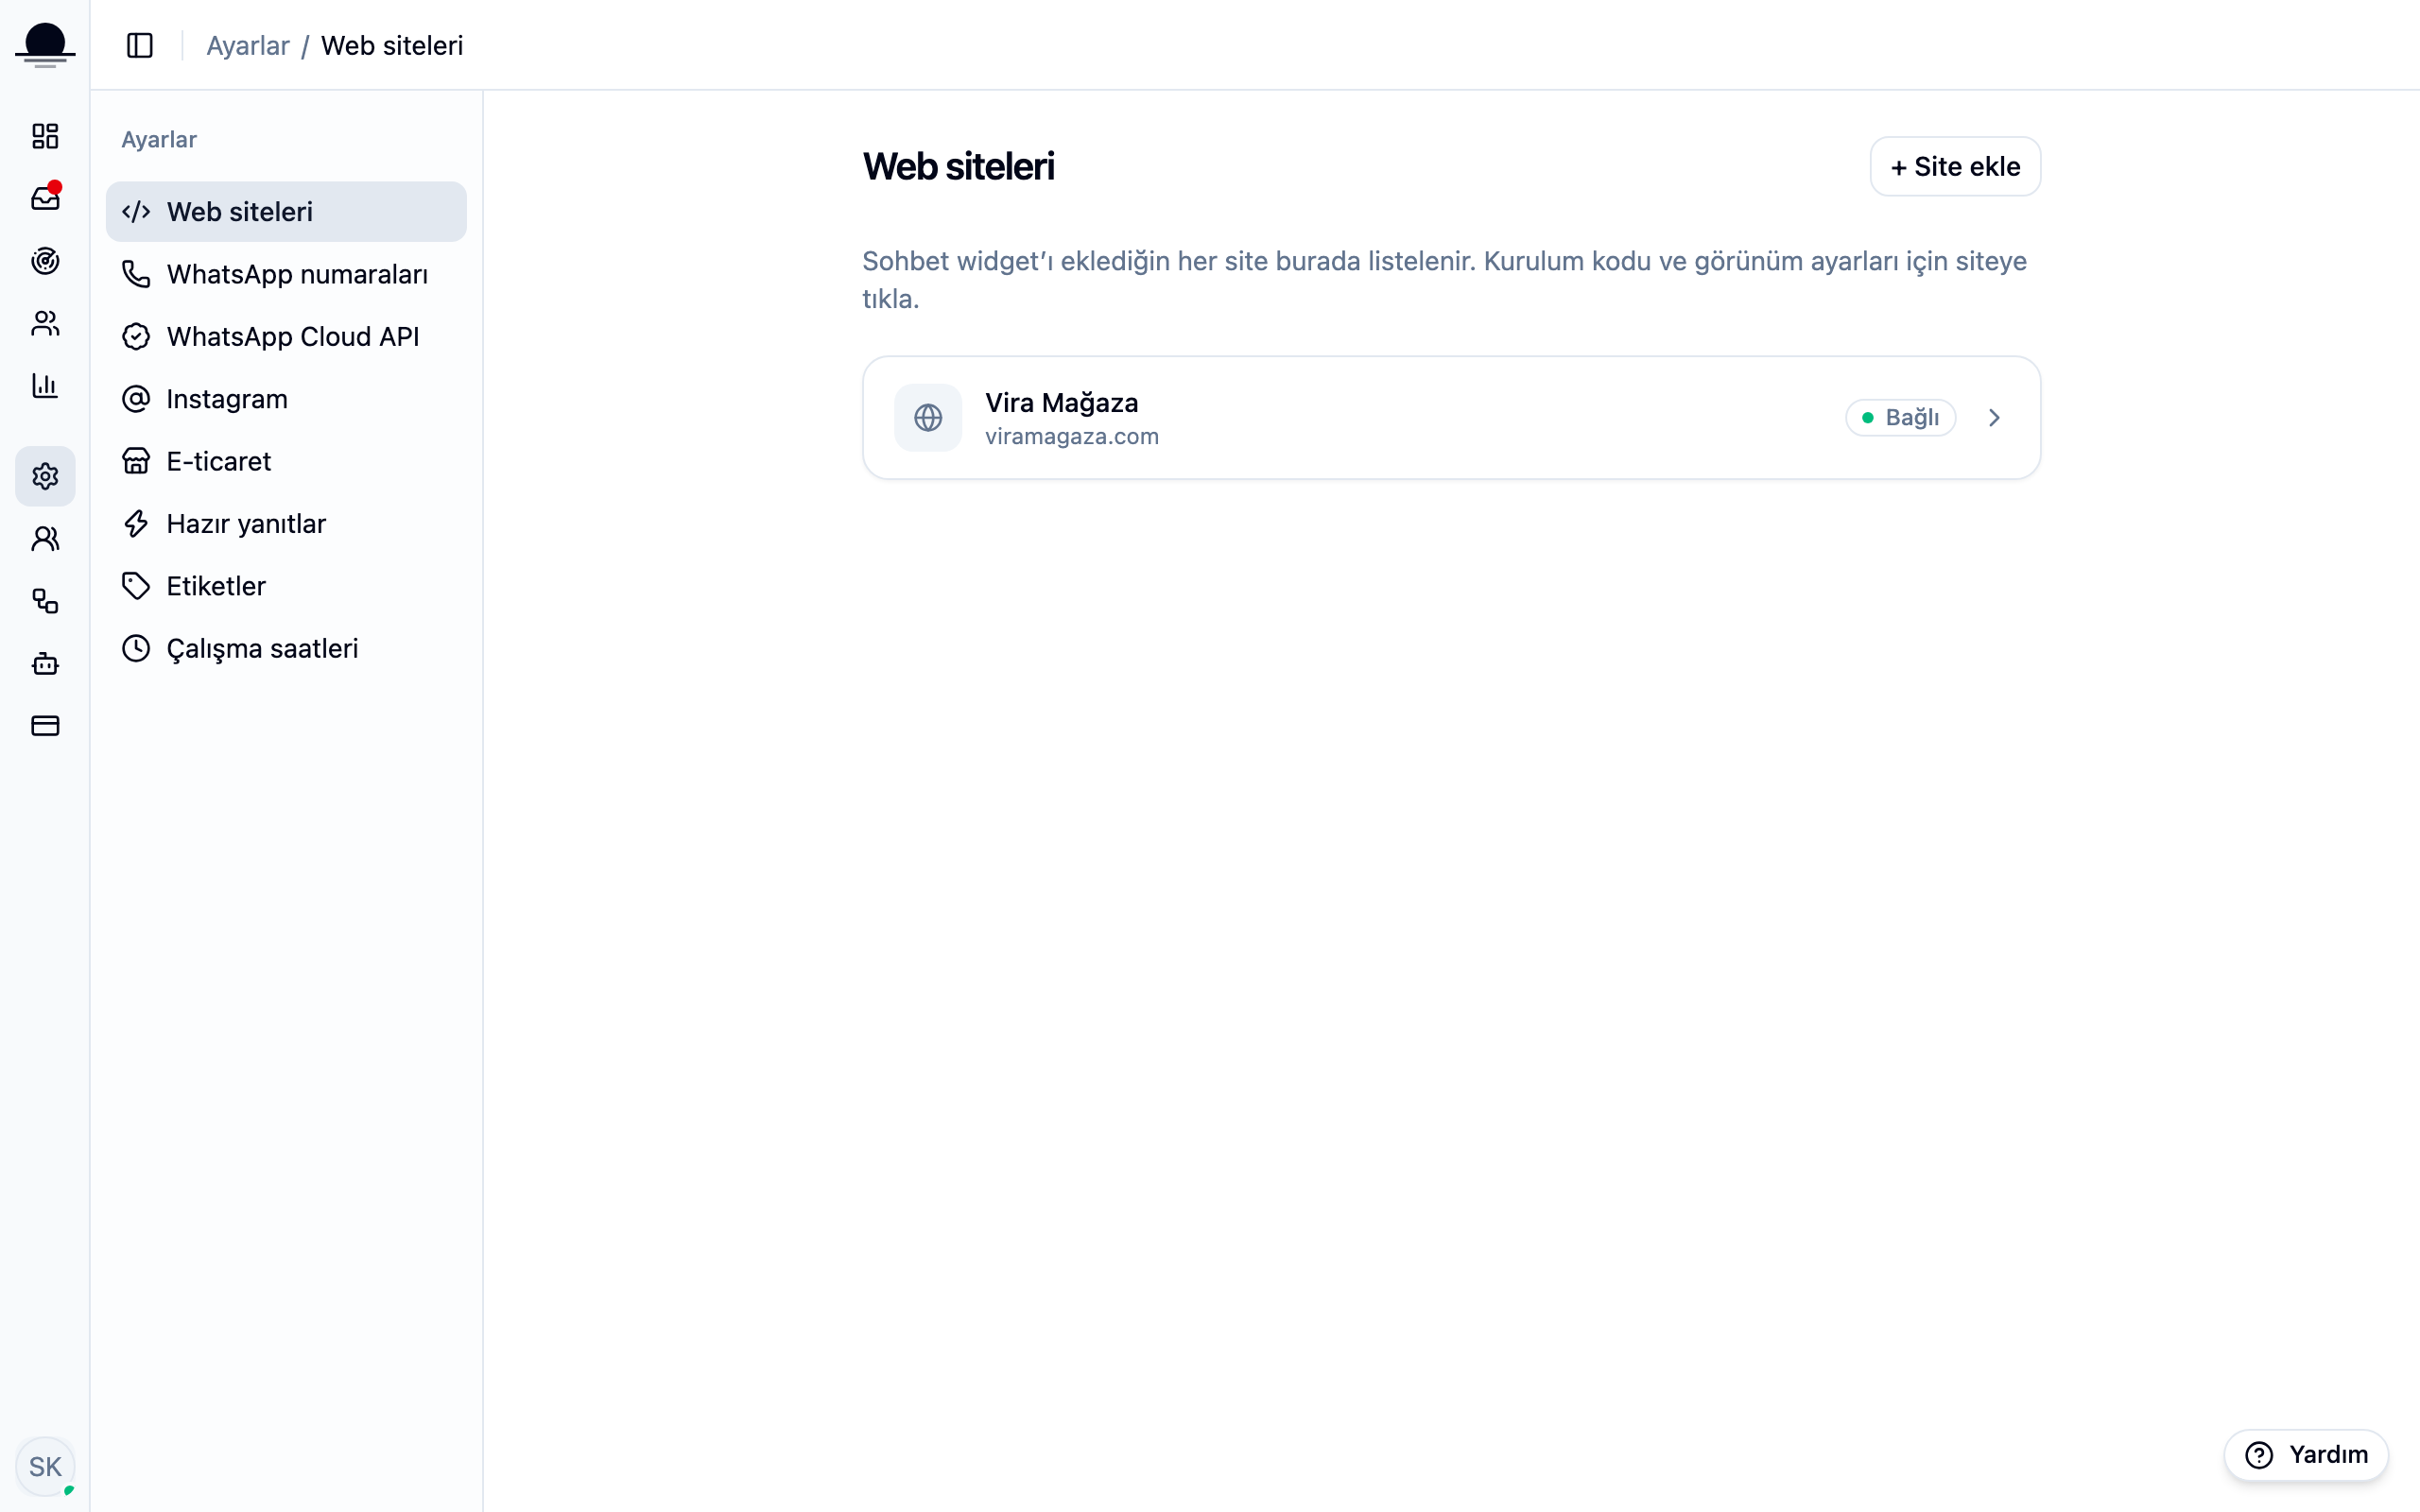
Register each site separately. Conversations carry the site they came from, and revoking one site's key leaves the others alone.
Copy the snippet from the Install tab
Open the site and switch to Install. The key inside the snippet belongs to that one site and works nowhere else. Copy code puts the whole block on your clipboard.
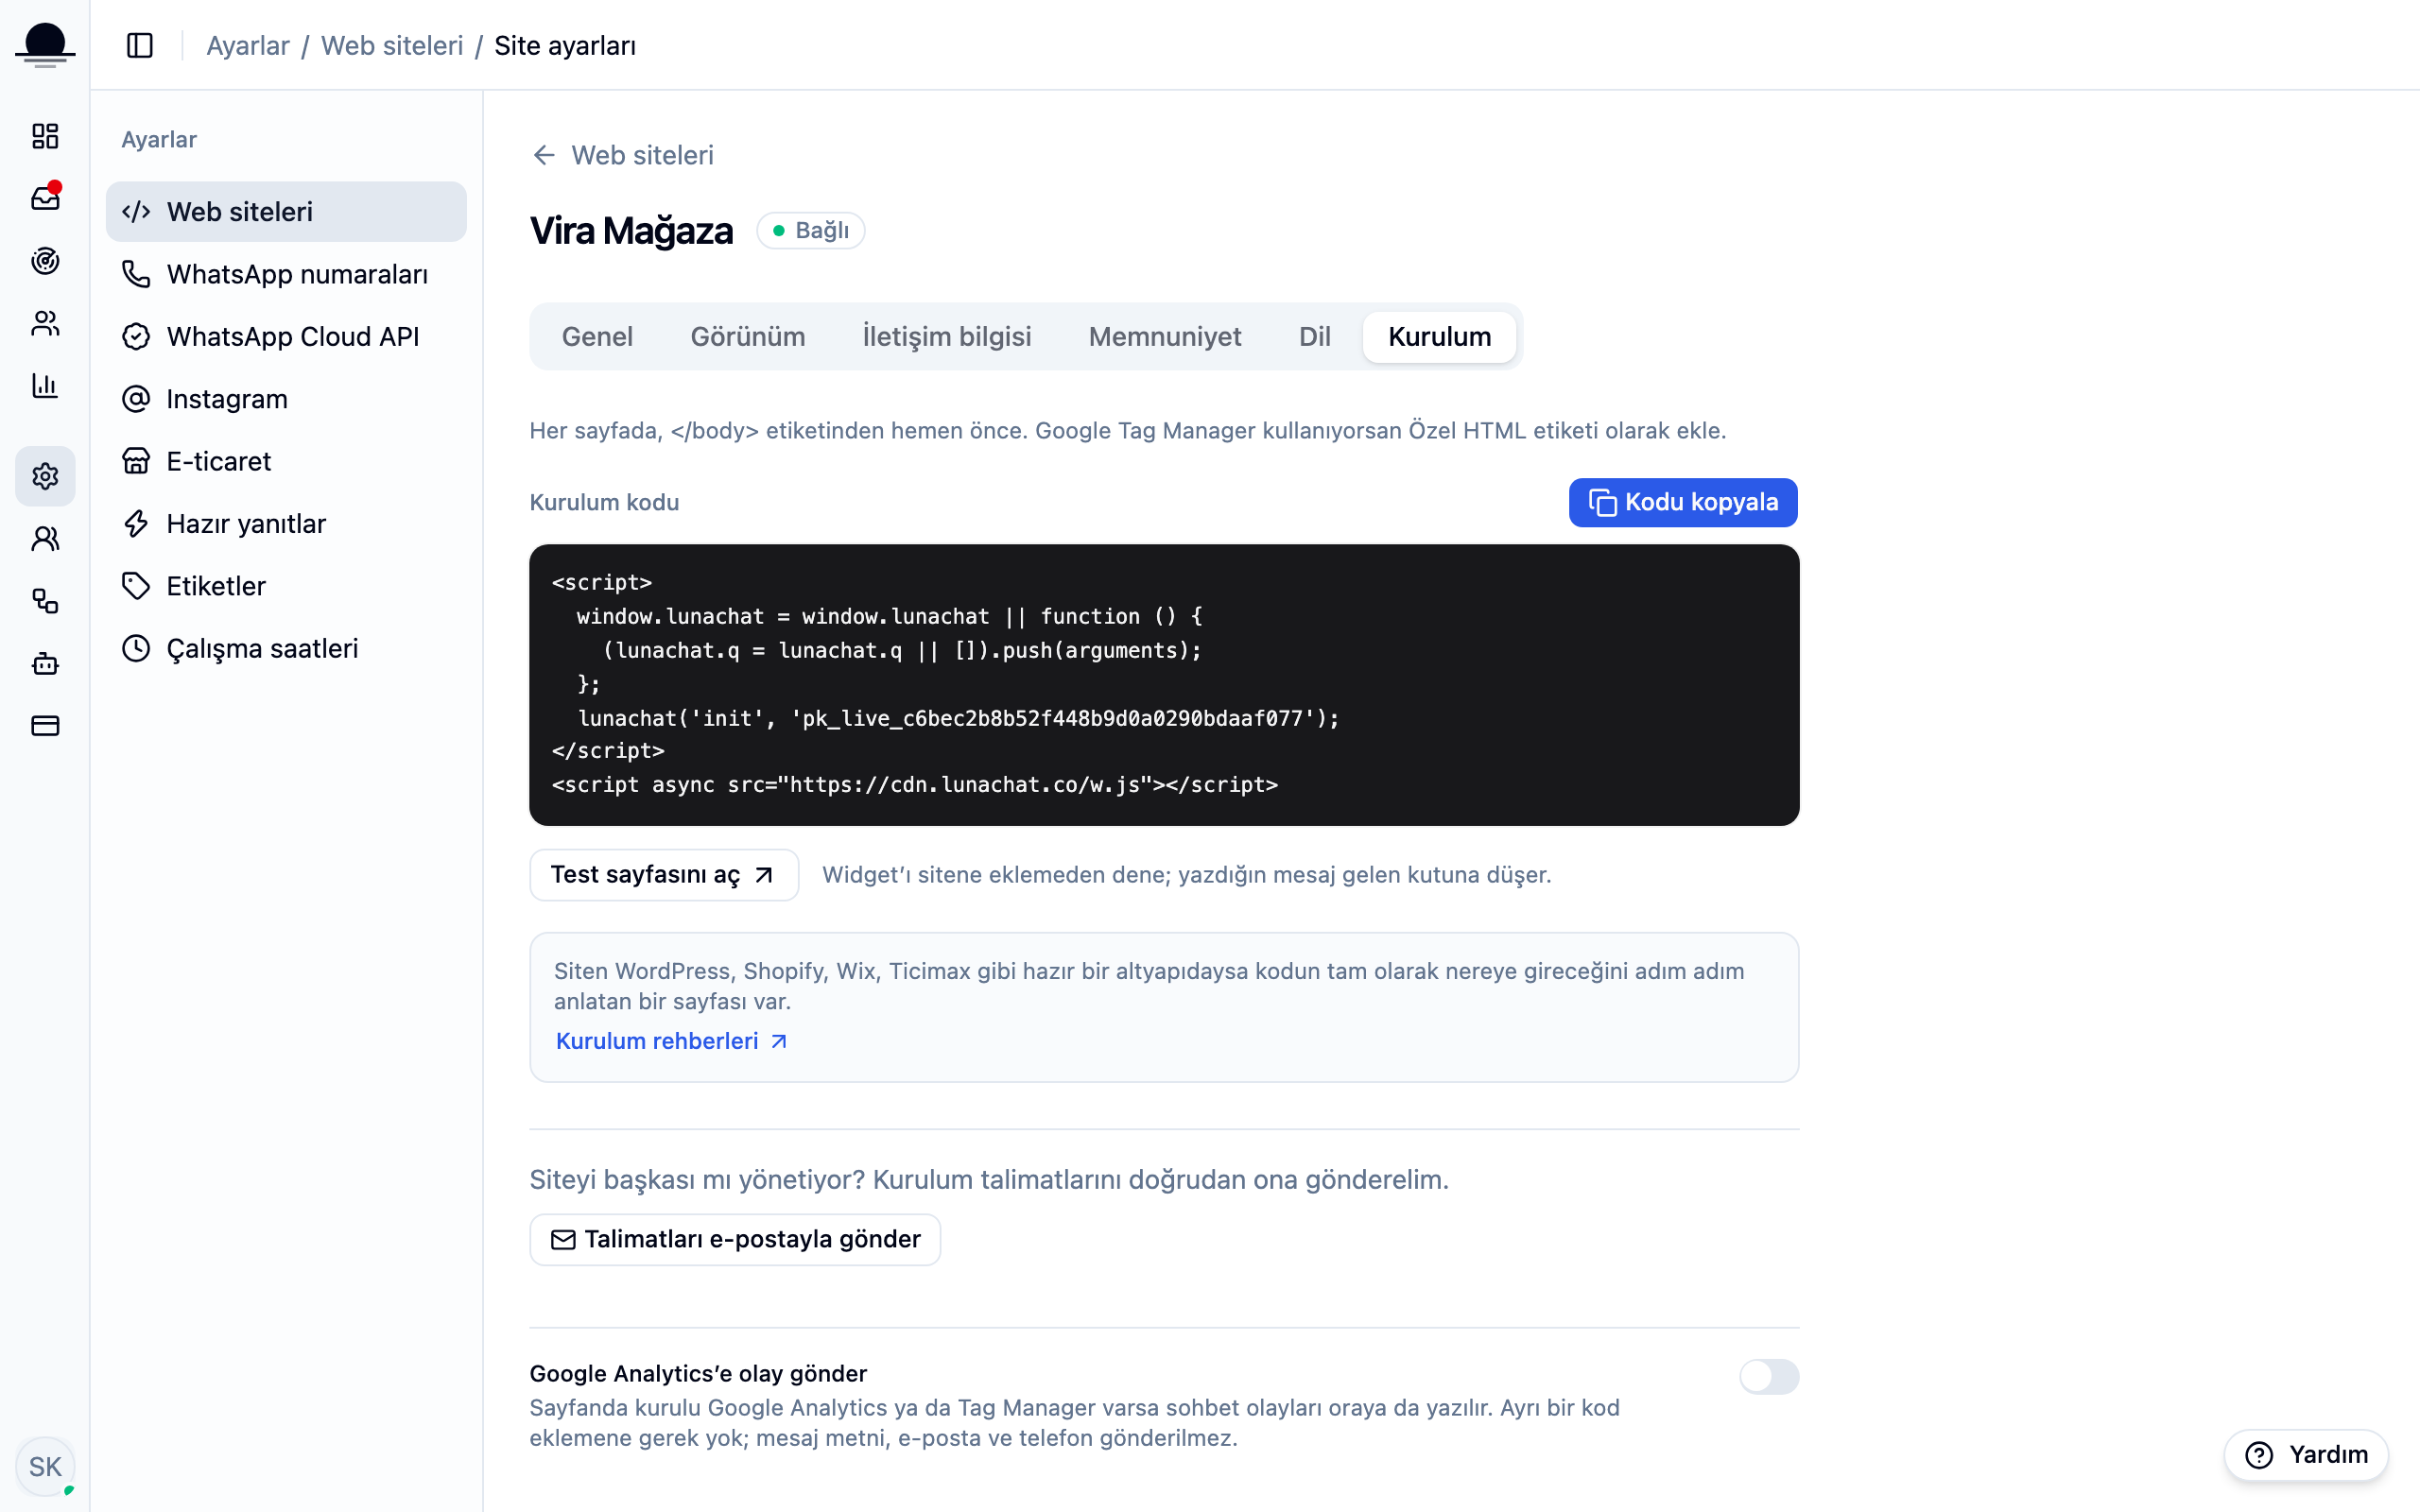
If someone else runs the site, Email the instructions sends them the snippet and the steps directly.
Paste it on every page, just before
</body>One insert into a shared template is enough. On hosted platforms such as WordPress, Shopify or Wix the steps differ, and each has its own integration guide.
If you use Google Tag Manager, add the snippet as a Custom HTML tag.
Open your site and confirm the connection
Load your site; the chat box should sit in the bottom corner. In the panel, the site's status turns from Waiting for code to Connected on that first load. Colour and greeting live in the Appearance tab.
Frequently asked
Related guides
No account yet?
The free plan covers 2 users and 200 conversations a month. No credit card.